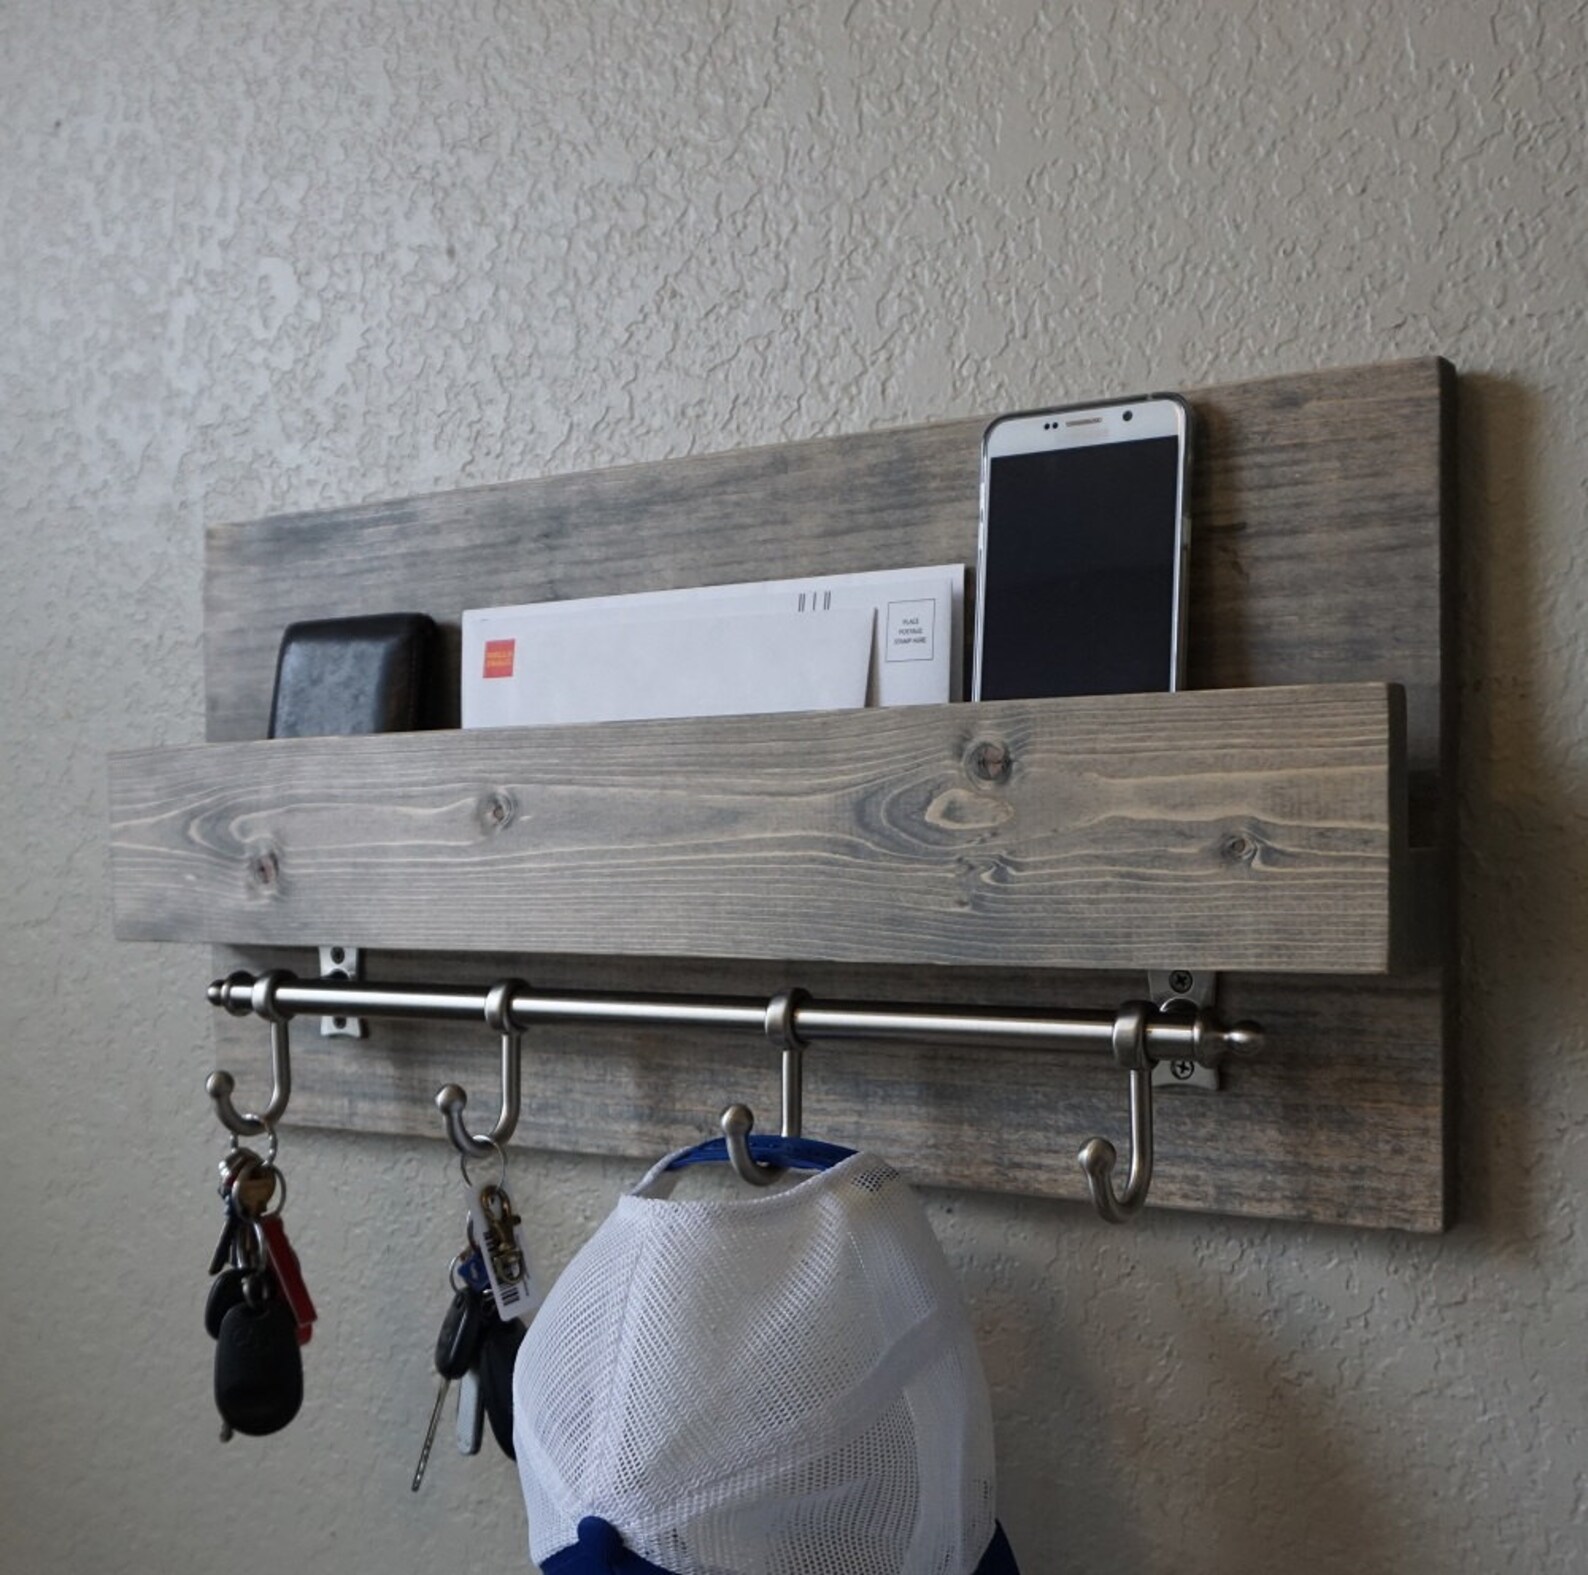
Handmade entryway mail organizer with satin nickel rail hooks. Perfect for any home entryway, apartment, or condo.
Made of solid wood. It has been lightly sanded down, then stained and sealed with a beautiful weathered gray finish.
This piece does not include the accessory items as shown in the pictures.
The color of the stained wood captured in the photos might vary slightly.
Dimensions: 23 in wide x 11.25 in tall x 3.25 in deep (pocket slot 1.5 in deep)
Keyhole hangers are installed on the back with heavy duty mounting screws and anchors included for easy wall hanging.
** PLEASE NOTE: ALL DESIGN IDEAS AND CONCEPTS ARE OF KEODECOR **
.*
Most item pieces are made to order, please allow 2-3 weeks on shipment of your order, depending on our work load, it could be a little sooner or take a little bit longer. If you need an item sooner than later or by a specific date, please message us and we will do our best to accommodate you. (We only want happy customers!)
We ship twice a week, every Tuesday and Friday, so please keep this in mind.
Shipping prices may seem high, but that shipping price includes handling, boxing of the item, packaging materials, and actual shipping cost. In most cases, shipping is more than what we charge you, we end up taking the cost out of the item itself.
Most items are shipped via USPS Parcel Select. If you need us to ship via UPS ground, please specify this on the notes section on purchase order.
This step by step diy woodworking project is about free porch swing plans. If you want to learn more about building a basic swing for your garden, we recommend you to pay attention to the instructions described in the article. There are so many bench swing plans and designs to choose from, so make sure you take a close look over the rest of the related woodworking projects that are featured on our website.
Before starting the actual construction project, we recommend you to plan everything, as to save money and to keep the costs under control. Adjust the size and the design of the bench swing to suit your needs. In addition, we recommend you to invest in high-quality materials, such as pine, redwood or cedar, as they have a nice finish and are highly durable, especially in a humid environment.
If you don’t have a rich expertise in woodworking field, you should ask a friend to give you a hand with the project. There are many things that you could go wrong, so make sure you plan everything and invest in quality materials. Select the lumber with attention, making sure the components are perfectly straight and in a very good condition. Use a carpentry square to check if the corners are right-angled.
Made from this plan
.*
Free Porch Swing Plans
Building a swing
Materials
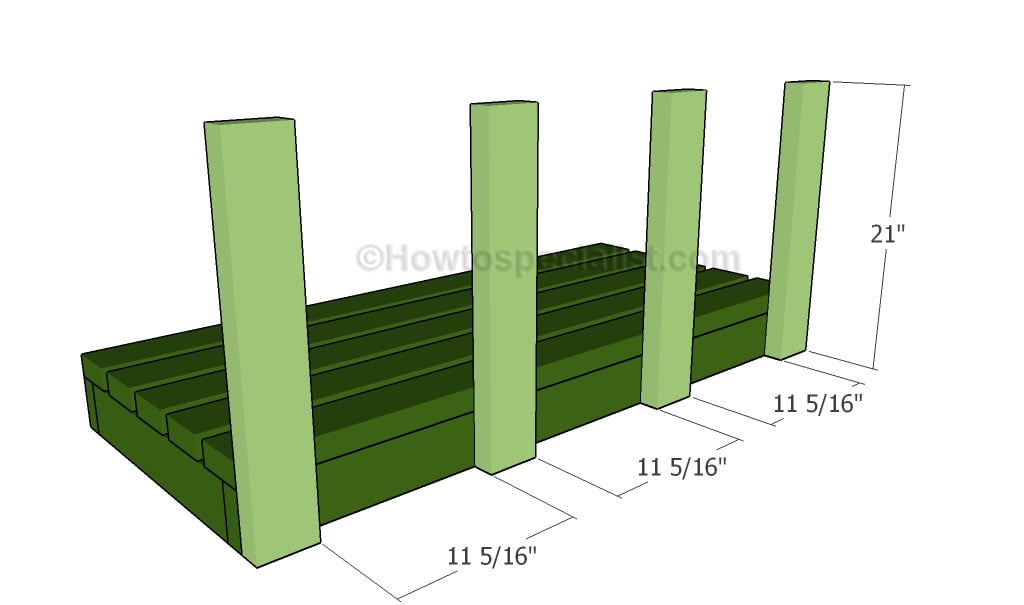
A – 2 pieces of 2×4 lumber – 48″ long, 4 pieces – 18″ long FRAME
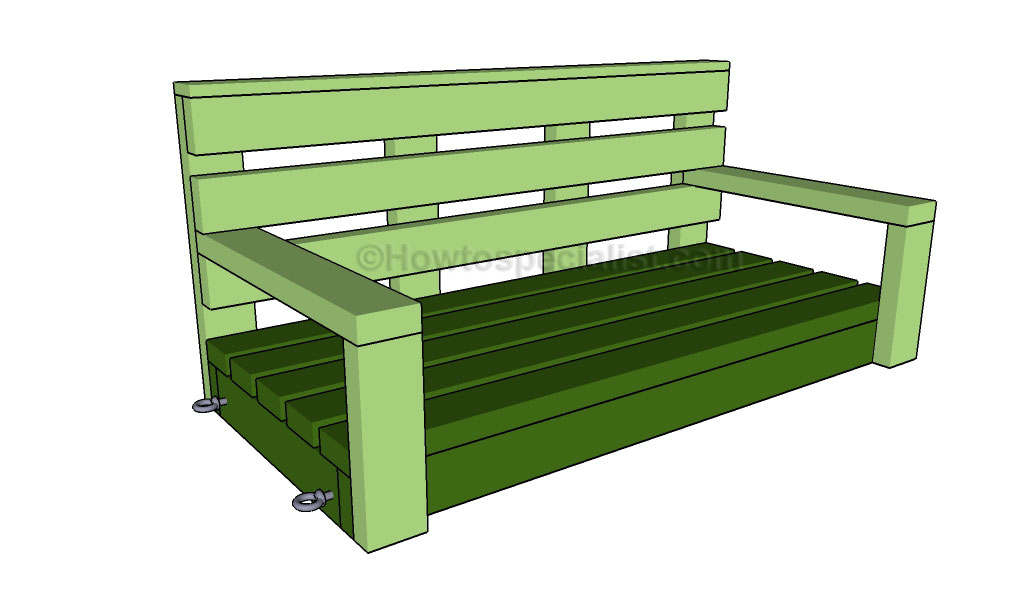
B – 5 pieces of 2×4 lumber – 48″ long SEAT
C – 4 pieces of 2×4 lumber – 21″ long SUPPORTS
D – 3 pieces of 2×4 lumber – 48″ long BACKREST
E – 2 pieces of 2×4 lumber – 22 1/2″ long, 2 pieces – 11″ long ARMRESTS
Apply several coats of wood stain to the wooden components
Fill the holes with wood filler and smooth the surface
Time
One Day
Building a pergola swing
Building the frame of the swing
The first step of the woodworking project is to build the frame of the porch swing. In order to get the job done in a professional manner, we recommend you to cut the components out of 2×4 lumber, after taking accurate measurements. Drill pocket holes at both ends of the short components. Assemble everything with great care, making sure the corners are square. Insert 2 1/2″ screws into the perpendicular components and add glue to enhance the rigidity of the bench.
Attaching the slats
Next, attach the 2×4 slats over the frame of the porch swing. Place the slats equally-spaced and drill pilot holes before securing them to the frame, using 2 1/2″ screws. Add glue to the joints and remove the excess using a damp cloth.
Attaching the back supports
Continue the woodworking project by attaching the 2×4 supports to the back of the swing seat. Drill pilot holes through the supports, plumb them with a spirit level and secure them to the frame by using 2 1/2″ galvanized screws. Add glue and leave no gaps between the components.
Attaching the back slats
Next, attach the 2×4 slats to the back rest of the porch swing. Drill pilot holes through the slats and secure them to the supports using 2 1/2″ galvanized screws. Place the backrest slats equally-spaced. Attach the 1×4 top trim to the backrest of the porch swing.
Attaching the armrests
In order to enhance the look of the porch swing, we suggest you to attach the armrests to the structure. Cut the components out of 2×4 lumber and lock them to the structure using 2 1/2″ screws. Add glue to the joints and make sure the corners are right-angled.
Last but not least, you need to take care of the final touches. Therefore, you need fill all the holes with a good filler and let the compound to dry out properly, before sanding the wooden surface with 120-grit sandpaper.
Smart Tip: Clean the residues with a dry cloth, before staining the chalkboard with the appropriate products for your tastes and needs.
Thank you for reading our article about free porch swing plans and we recommend you to check out the rest of our home improvement projects. Don’t forget to LIKE and SHARE this projects to your friends, using the social media widgets, if you’ve found it useful.