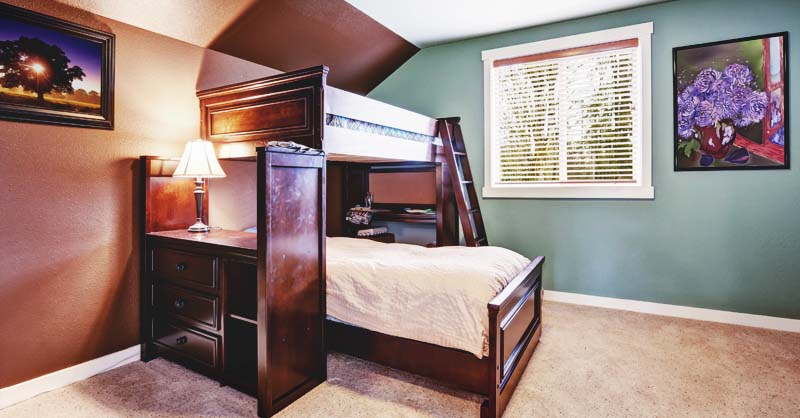
A few years back my husband and I decided we wanted to make our girls a set of bunk beds. They shared a room and we felt it would help with space.
My husband, being the creative genius that he is, decided to attach them to the wall and even gave them a third bunk for their friends.
That got me to thinking, what loft beds are out there? Now that our girls will have their own room soon, here are some ideas I have come up with.
Comfortable Loft Beds
1. Fire Engine
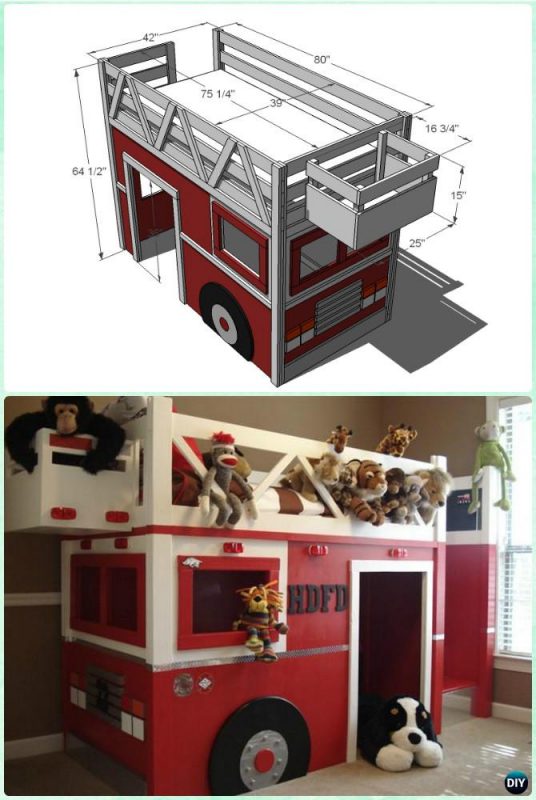
So many loft beds cater to girls. This one is cute because it could be gender neutral but it really seems like something a boy would like. I also think that the full stairs going up are nice, especially for younger kids. If you find the right plan, you could have storage there as well.
You can find the plans at DIY How To.
2. Bohemian Style
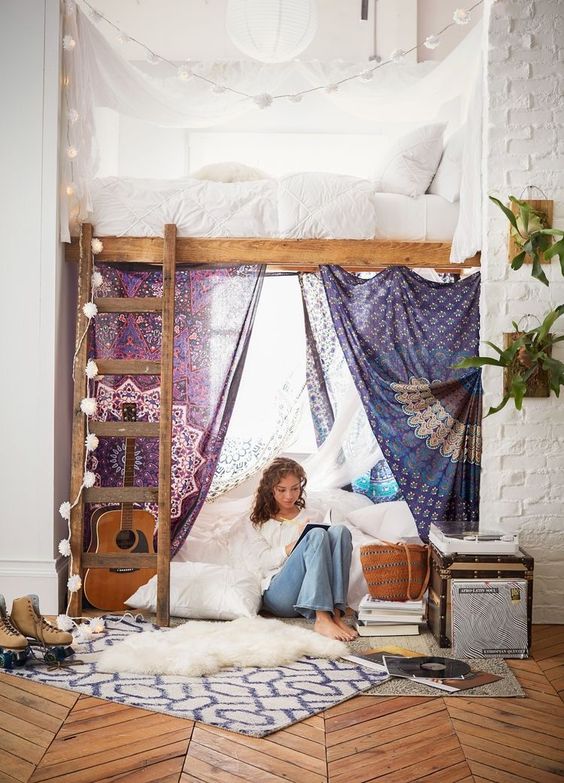
This one is definitely for the teen. I see it as the teen who loves to travel too. She used her loft bed more as a bunk bed, though the bottom “bunk” is actually on the ground.
Surrounded by lights, bohemian style sheets, and a guitar, this would be a perfect “hideout” for a teenager.
The plan can be found at Homeizy.
3. The Original
This picture, or one similar, came out shortly after my girls were able to walk and I instantly fell in love with this. I think my favorite part is that there is so much storage. Not mention the bright colors makes me happy. This is ideal for a kid of any age I believe!
This loft bed can be found at Pottery Barn Teen but a similar project can also be found at Ana White.
4. Loft Life
I think this would be perfect for someone who is a young adult and needs to live in a studio apartment. They will have shelving for books, or trinkets, or whatever and they could put a couch down below.
The space above gives room for the home to be airy and comfortable for one. To see more, check out this loft house here.
5. When There is a Crowd
My mother has two granddaughters by me and one by my brother. He and his wife are trying for another starting in January. This would be a perfect little fun getaway for kids when they all have a sleepover at Mimi's house.
So this is for the beachfront home where several families get together in the summer. A dream that my mother has and I will too one day!
To see more of this cute layout, check it out at contemporist.
6. For the business minded
I love this one because it really turns the loft area down below into a workroom. I have a friend who works from home and is wanting to get her own place soon. Having a studio could be quite possible if she has a work area and what better way to have a work area than to create your own?
Head over to apartment therapy to see more but be warned! That place is addictive.
7. Loving the Lights
I like this one partially because it gives the airy feel that comes from the lighting on the bottom side of the bed. The creator of this space obviously wanted a little reading nook and who could blame them?
To see more, check out the Scandinavian Loft page.
8. Dorm Life
This bed looks exactly like the dorm beds at the University I attended. Several of my fellow students would build their beds up like this and keep stuff underneath.
I don't think any of us thought about putting a hammock underneath but this idea is super cute. If you came here because you are looking for ways to cute-ify your dorm room, check out this Buzzfeed article.
9. Woodsy Theme
This one is super cute for the kid that loves the outdoors. They have their own little cabin in their room.
It puts me in mind of when I was little and would play like I was on vacation somewhere warm when we had snow days. In this room, that would be very easy!
10. Treehouse Life
This treehouse-themed loft area is perfect with both the natural lighting coming in and the lights hanging from the tree.
It was created by a French sculptor and the website must be translated; however, I couldn't resist sending you this beautiful piece of art that doubles as a bed area.
11. Climbing the Walls
I can tell that this one has a small bed down below and what looks to be either a cube or a child's toy stove but what really stands out here is the climbing wall to get to the upper bunk. Add to that maybe a slide to get down and the parent might not see their child for hours or more.
This comes from apartment therapy as well and is one of the coolest ones on the list, in my opinion.
12. Babe Cave
For a while, after we moved into the house before the bunk beds got made, the girls put their tent up and slept in there. I guess it felt more like a bed to them than the mattress on the floor did.
This is cute because it gives that outdoorsy feel but still shines a hint of girly in the room as well. You can see more kids room ideas.
13. Fun for Everyone
I love this idea because there is so much going on.
There is a hammock in the corner, a swing, a place to put towels, some bedding and more toys. My only concern would be putting up the railing. Even the heaviest sleeper could fall off, my daughter is proof of that!
This original article has unfortunately been removed, but this image will still give you a lot of inspiration.
14. Those Stairs Though
This one has a very sophisticated look to it. Those stairs are impeccable in my opinion. They have a very professional, adult feel to it.
I think this would be perfect for the refined girl and her friends to have a place to gossip and talk about the latest happenings down below and sleep with their masks up above. The bed definitely leaves room for a friend or two!
15. Not Sure
This one is cute but one that I cannot quite put my finger on. I was thinking maybe a parent of a young child's home. The carpet is nice and gives it a homey feel but the toys everywhere say kids area.
Either way, the loft bed area does the trick of giving this person the room to have fun and be able to sleep!
16. NYC to me
This is probably one of my favorite little loft areas. Set above what looks to be a tiny kitchen this loft area, with its blue lights, would be nice for almost anyone to curl up on a bed and doze off into the night.
For some reason, it makes me think of a tiny apartment in New York City. I feel like I should be able to see the skyline just peering through a window from across the room.
17. True Neutral
I love this area because it is truly a neutral place, with the colors not being pink or blue but instead, a mix of subdued colors.
The strings make it look cute and there is a place for toy storage, a place for studying and anything a kid would truly need to have a kid-friendly time!
18. My New York City
I have secretly been looking at homes in my favorite city in the world- New York. I have seen for myself that living in a small area is doable with my little ones but I think that a one bedroom is a must.
Give the girls a room and the husband and I could have the living room with a set up like this- complete with cuddling and everything. I love the fact that the upper area has curtains as well. Perfect for when you need to feel like you have your own bedroom.
Naturally, this lovely area comes from Apartment Therapy.
19. Three Twenty Five
The article to read. Though the loft bed is plain, it helps the couple that owns this place to be able to achieve exactly what they were wanting to with their space.
They can sit on the futon and still be able to watch television. Maybe even do so while the other one is sleeping.
With only three hundred and twenty-five square feet, having a loft bed and bright lights sure makes this apartment feel bigger than it is!
20. Lockers
This looks as if it was in a showroom of Ikea but that's okay. If you have never been to Ikea I highly recommend it for people who are looking to live the low footprint life. They will give inspiration to people like the couple above.
I posted this loft bed because I liked the color scheme, the light above the bed, and the lockers!
21. Dwell
This one is nice because it was built to suit a small home and he is able to have his seasonings underneath his bed area, along with a heater and a workstation.
Yet another perfect one for an adult who works and lives in a tiny home. Loft beds are amazing for that and so is this site. Be sure to check them out for lots of great inspiration.
22. Your Own Space
Yet again, this is a dorm room and it's super cool. I don't know if the person who created this awesome room had a roommate or not but how fun would it be to hang out in here with them?
It makes me want to go back to college again. These pictures do as well!
23. Organization
This one doesn't have room underneath it to play but it does keep all of the organization in one place. With bookshelves, a dresser and a separate shelf there is no need to lose anything and it still gives you space for everything else you need.
24. For the Closet Girl
Do you have a girl that is super stylish and has a ton of clothes? Are you that girl? Then this may be the loft bed for you because it comes with a storage area to fold your clothes and even a storage area to hang your clothes.
An added bonus is that you have a desk area to work on your latest creations. To purchase this beautiful loft bed or to see more, check out Ikea. See, I told you they were awesome.
25. Taking Over the Room
I love this loft bed because it essentially takes over the whole room. The stairs going up to the loft area are nice and spacious. Shelving abounds in this room.
The lighter colors and the clear holdup boards add to the nice, clean look of the room. Just be sure to make your bed!
Conclusion
No matter where you are at in life, a loft bed might be something to consider since it gives space for more stuff or more room to roam around.
You can order one from places such as Pottery Barn or make your own using templates similar to Ana White's. No matter what you choose, you can sleep tight knowing you and your stuff is all secure.
Until next time!
Original article and pictures take https://morningchores.com/loft-bed-plans/?utm_source=push?utm_source=imagepin site